
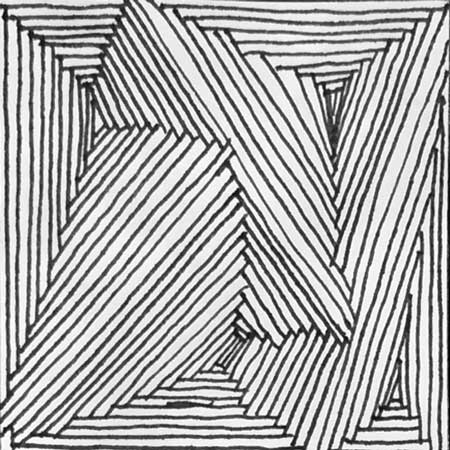
 | Drawing Practice Activity The warm up activity to this project will require each student to create a variety of optical illusions in small sample spaces. The handouts below will be used to guide you through this process. Even though this is just practice for the actual project we will be doing, It's important that you are focused and take your time to create the most precise drawings possible. Using the Line Design Handout, please follow the word-less directions that were designed for you. I'm giving you the freedom to interpret those directions your own way to complete the handout. This warm up project will take 40 minutes, and the content learned in this simple warm up will be used to invent your own designs next class.
| ||||
Inventing your own designs
Step by Step Directions
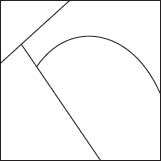
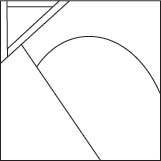
Step One:
Start with 3-4 random lines inside the square to break up the space. These can be straight lines or curves. Each line should start and end at the border of the design.
Placing these first lines – you divided the square into few areas. Now you concentrate on one area at a time.
Step by Step Directions
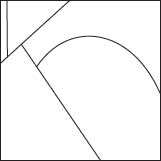
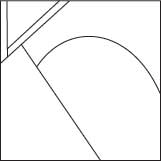
Step One:
Start with 3-4 random lines inside the square to break up the space. These can be straight lines or curves. Each line should start and end at the border of the design.
Placing these first lines – you divided the square into few areas. Now you concentrate on one area at a time.
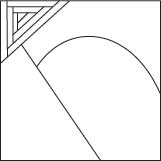
Step Two:
Start placing lines parallel to the outline of the area.
Start placing lines parallel to the outline of the area.
Step Three:
Get them close together without having them touch (except at the ends).
Get them close together without having them touch (except at the ends).
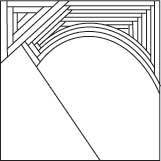
Step Four:
You can do that in a circle, or use only select sides of the area, or use only 2 sides
You can do that in a circle, or use only select sides of the area, or use only 2 sides
Step Five:
Once you are done with one area – move to the next
Once you are done with one area – move to the next
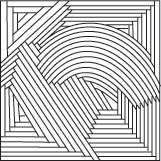
- Step Six:
- Continue the process until your design is done.
The worksheet contains 12 squares for you to design. I will be grading the top six designs that you indicate for me to grade. Use the entire 90 minute period to create as many designs as possible. If you don't finish all 12 by the end of class, you may take the worksheet home and turn it in the next time we meet. We will be moving on to the Optical Illusions with Line project once this activity is complete.
 RSS Feed
