DRHSART
  • About
    • Scholastics
    • Take Art!
    • The Creative Corner
    • Jackson Pollock Collaboration
  • Studio
    • ART 45 >
      • Art 45 Assignments Blog
    • Art 3 >
      • Art 3 Assignments Blog
    • Art 2 >
      • Art 2 Assignments Blog
    • Art 1 >
      • Art 1 Assignment Blog
      • Perspective Examples
  • Gallery
    • DRHSART GALLERY
    • Highlights
    • Student Portfolios
  • Featured Artists
  • DRHSART LEVELS

Thinking Big | Working Small

10/7/2021

0 Comments

 
Picture
Picture
Picture
Picture
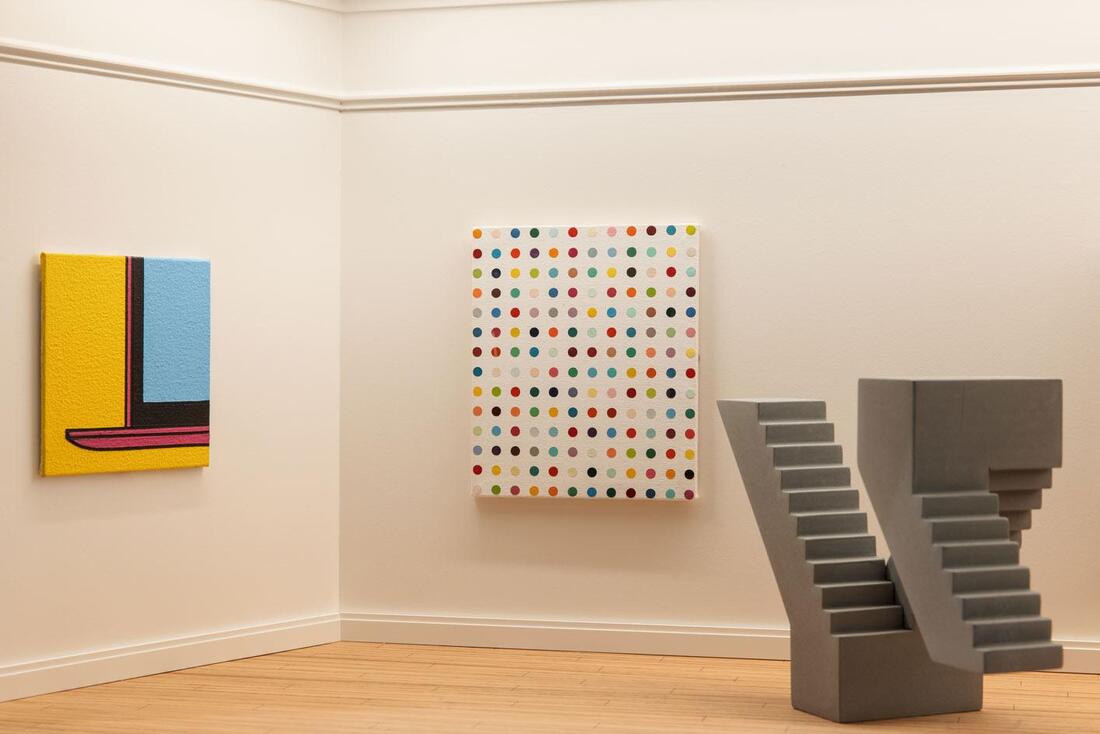
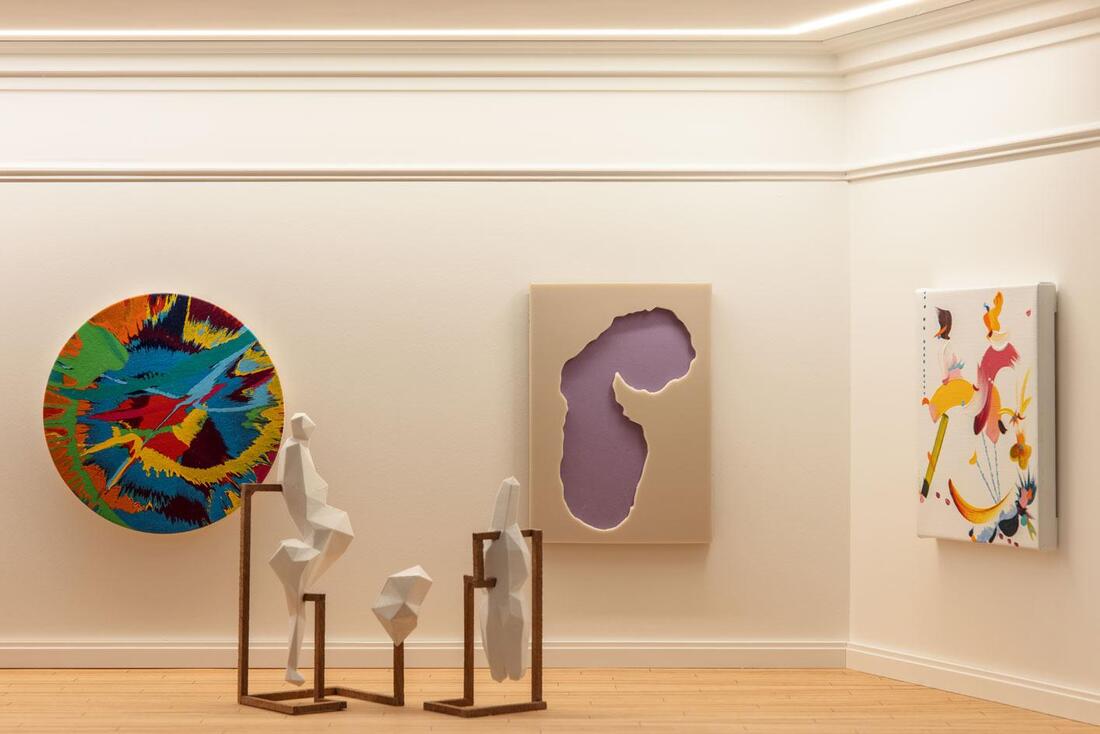
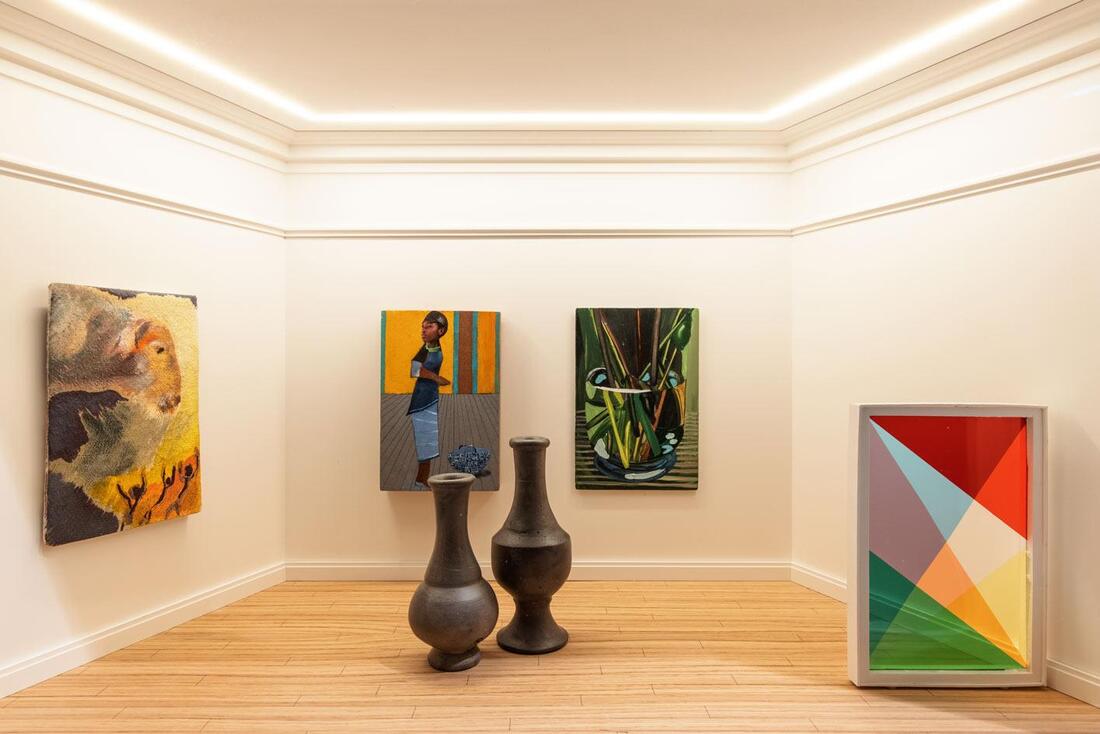
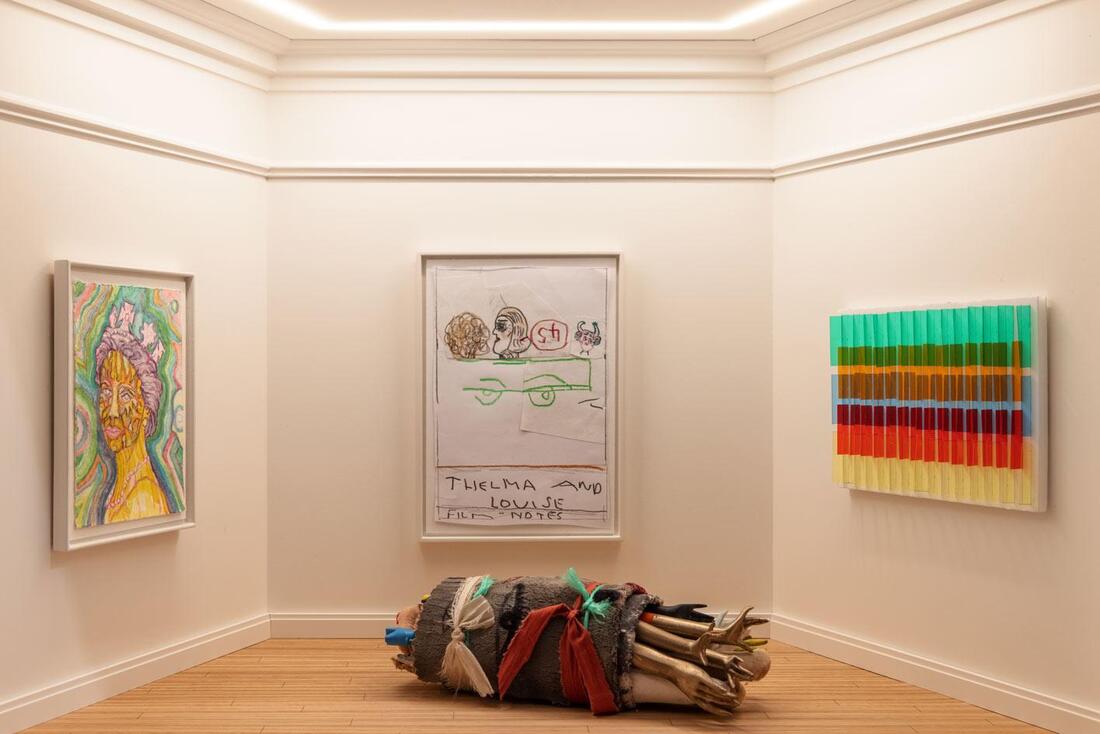
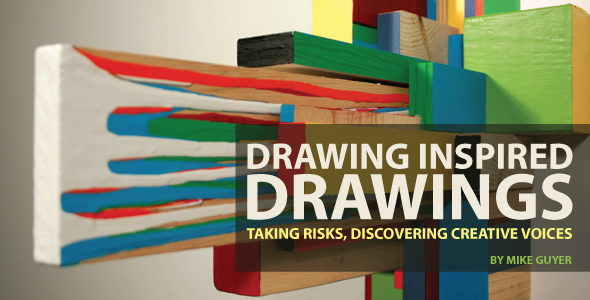
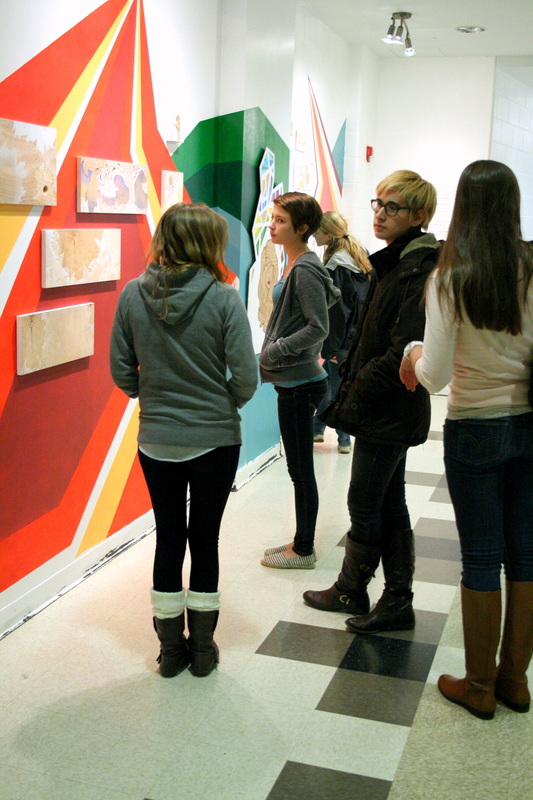
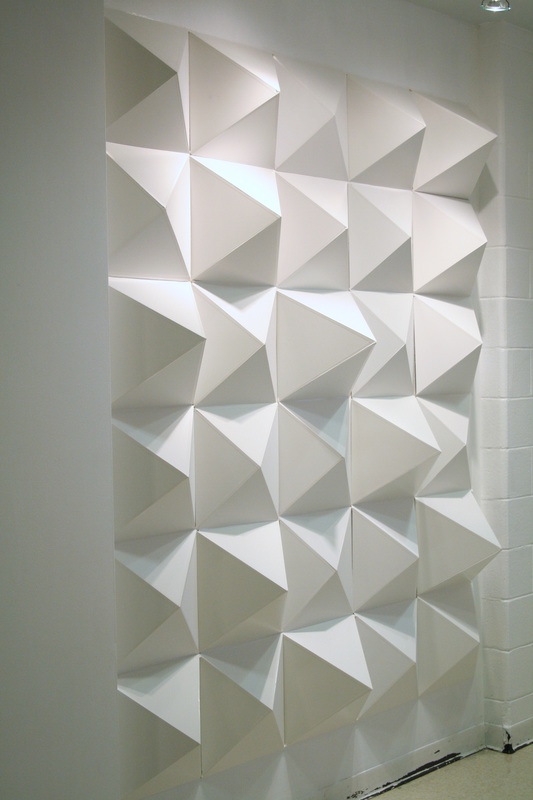
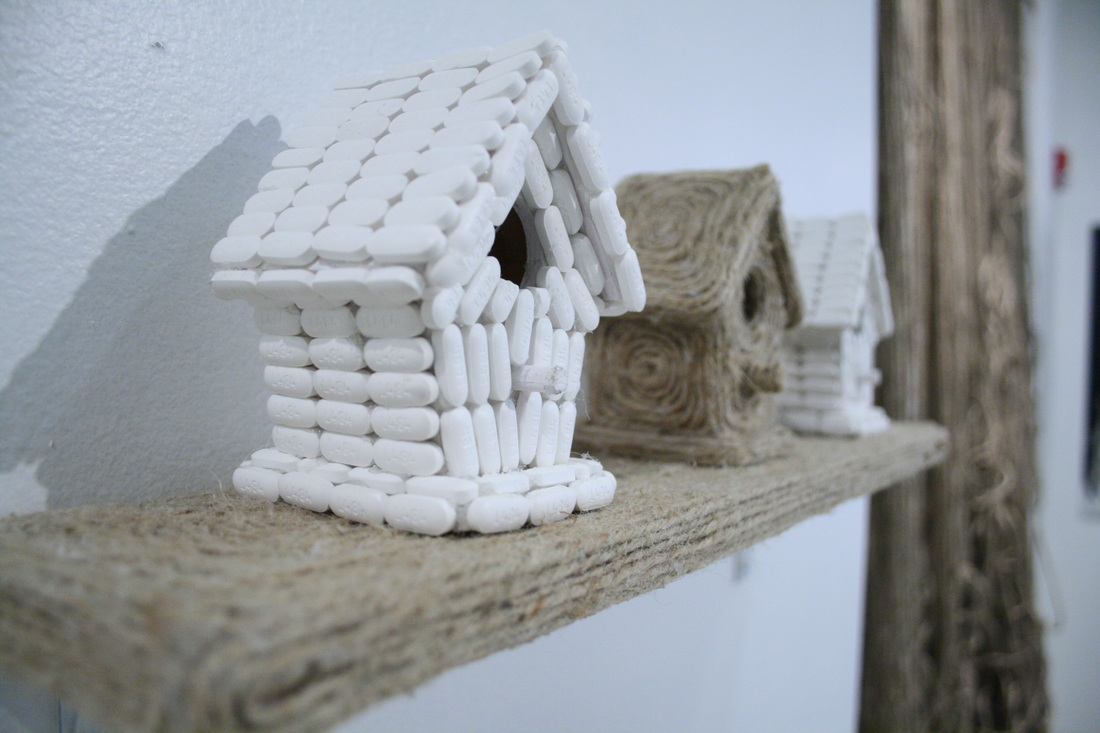
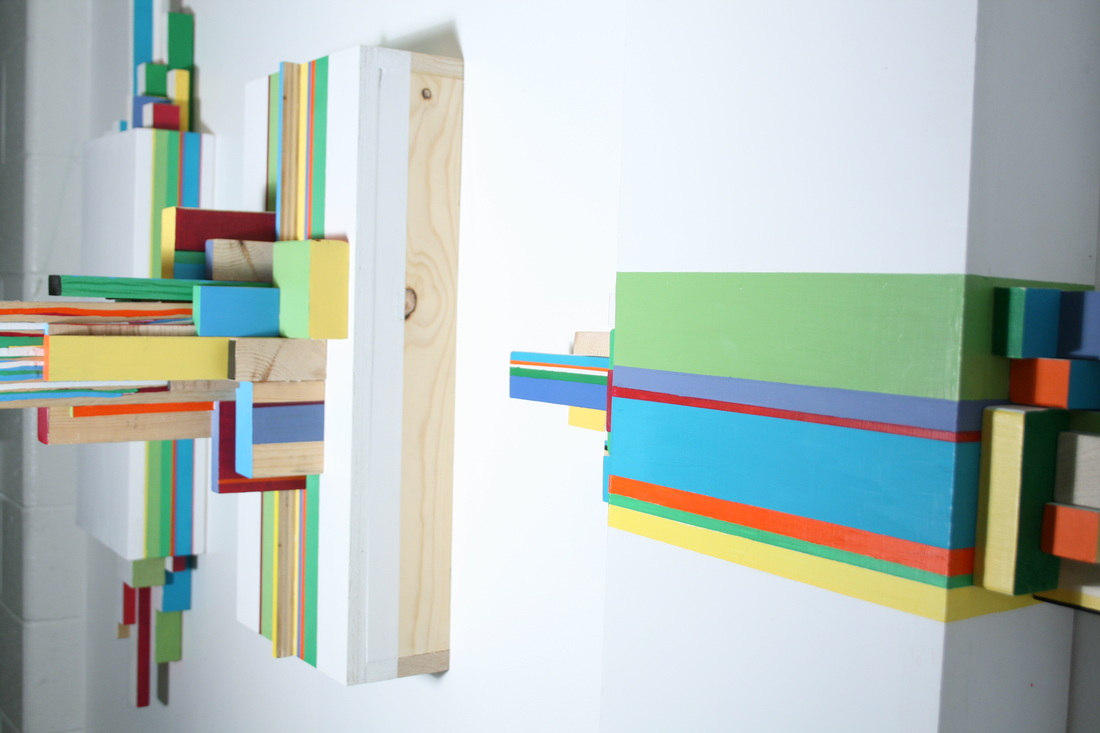
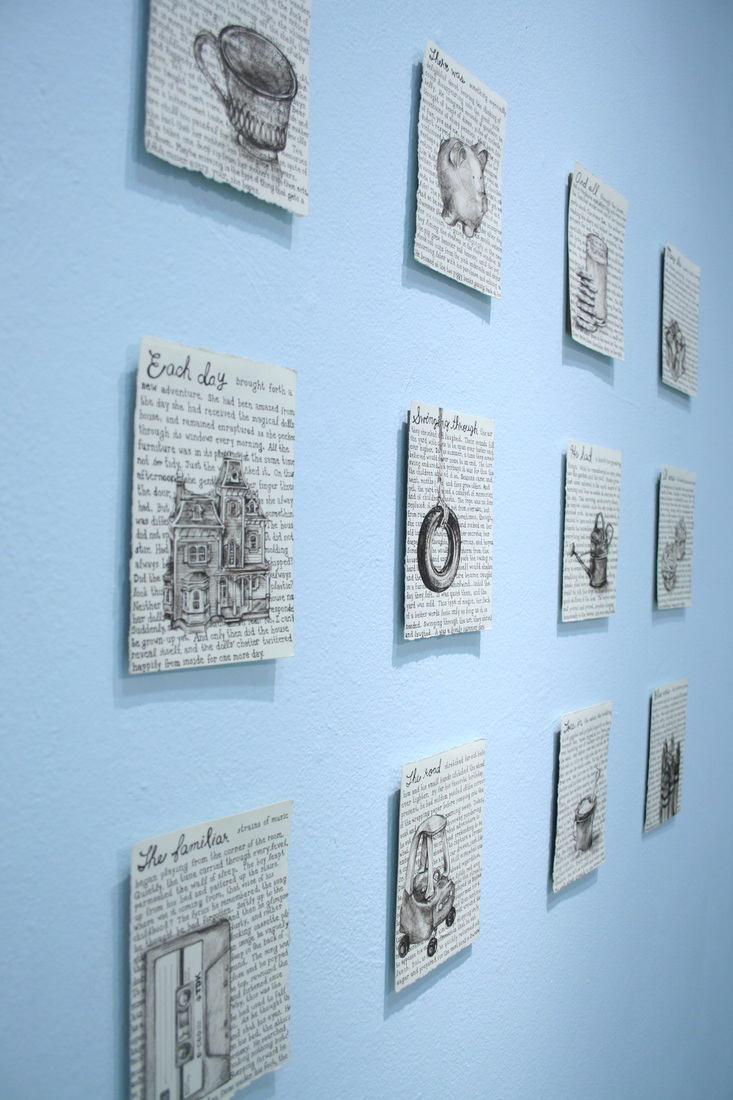
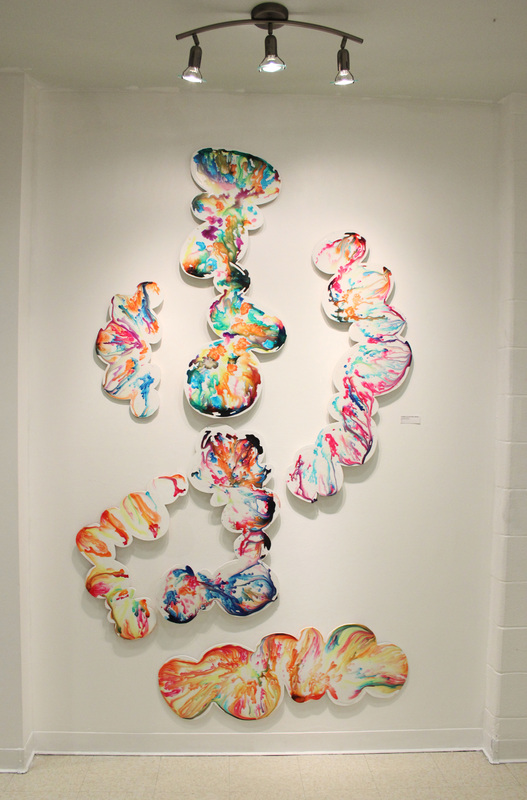
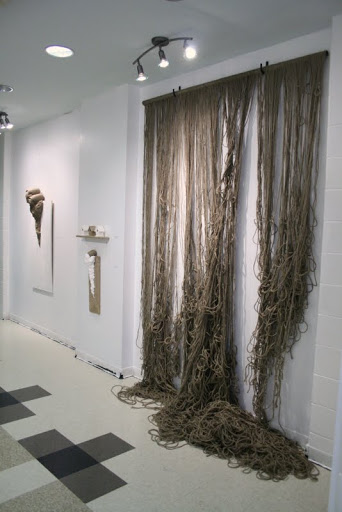
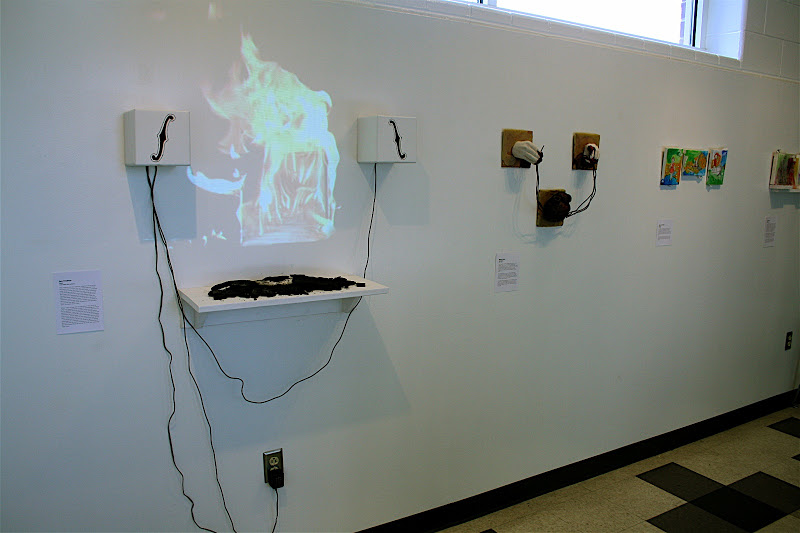
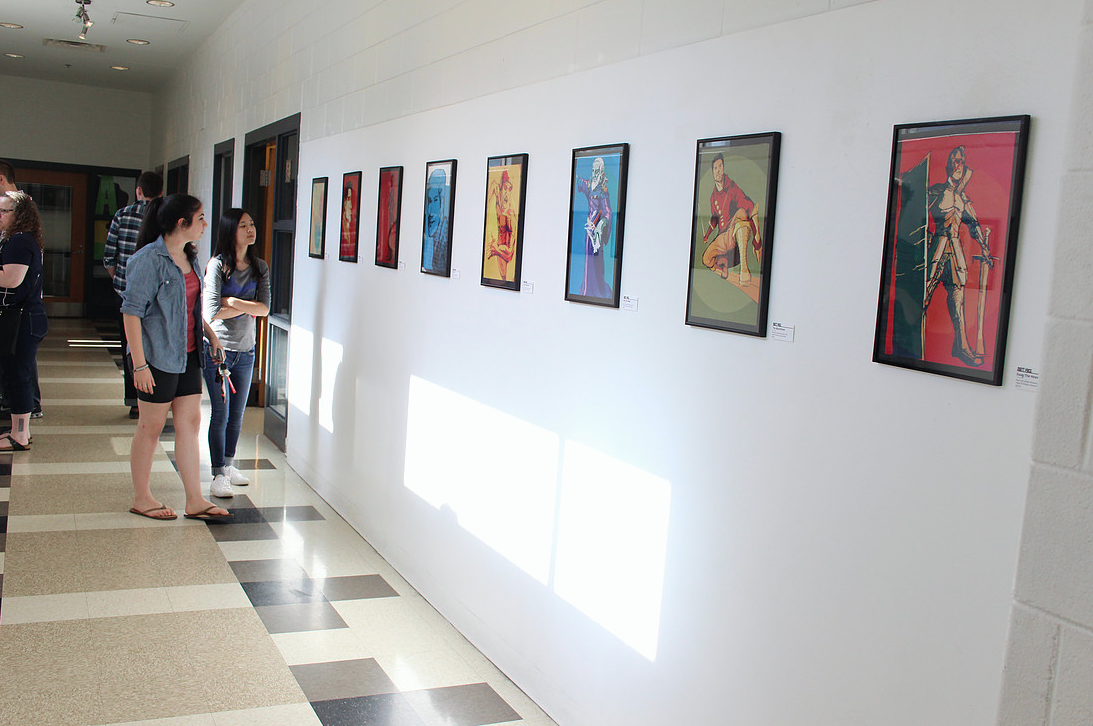
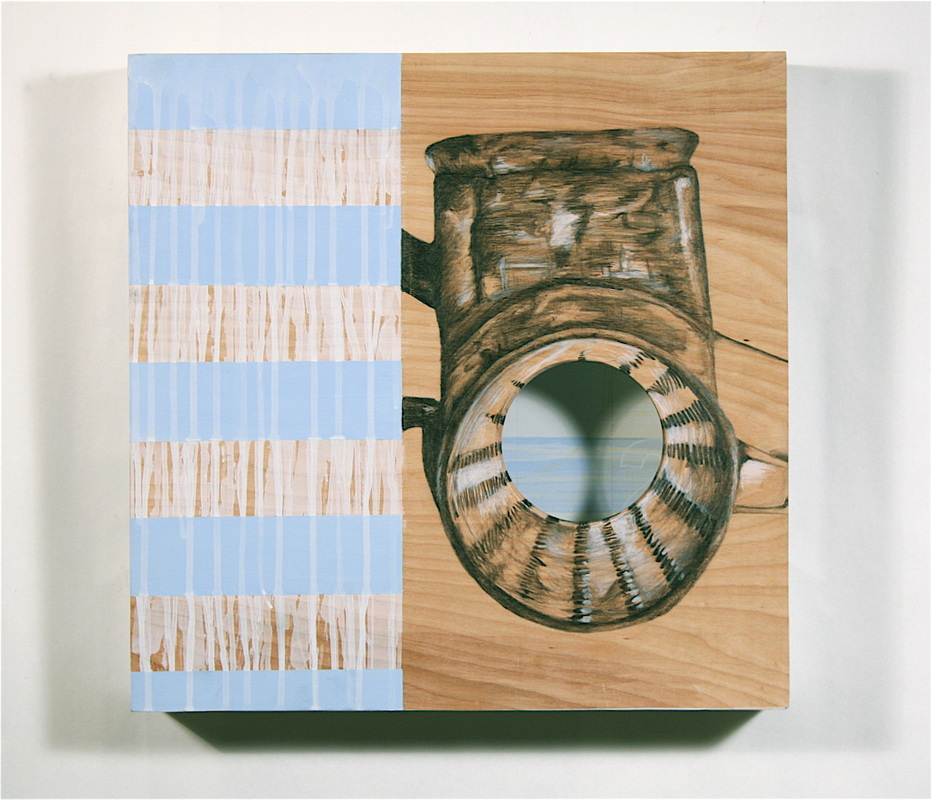
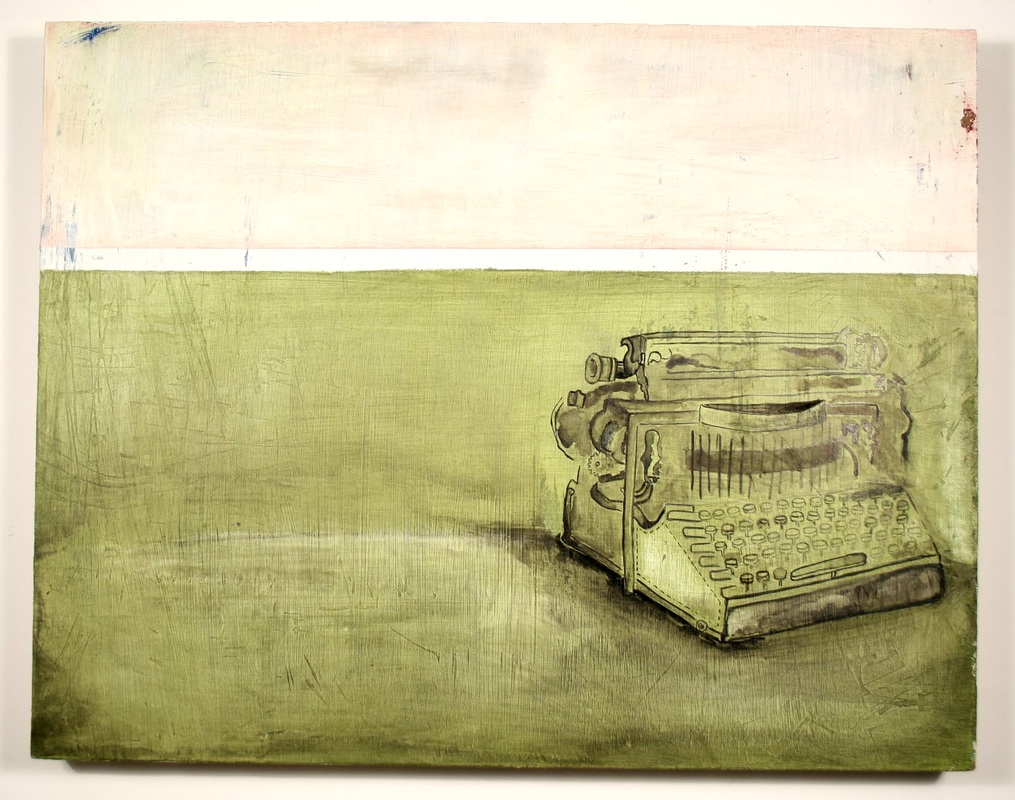
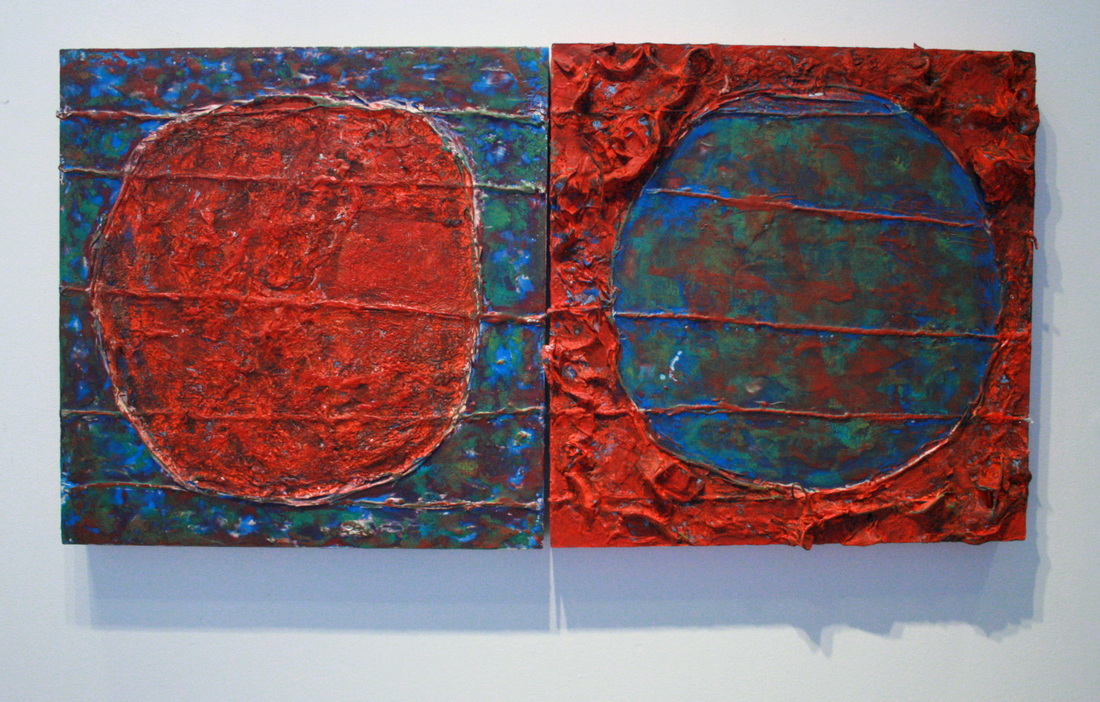
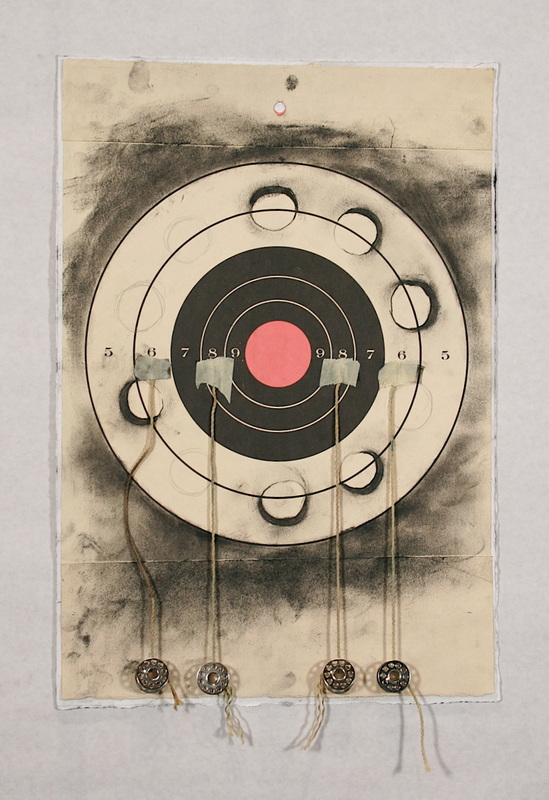
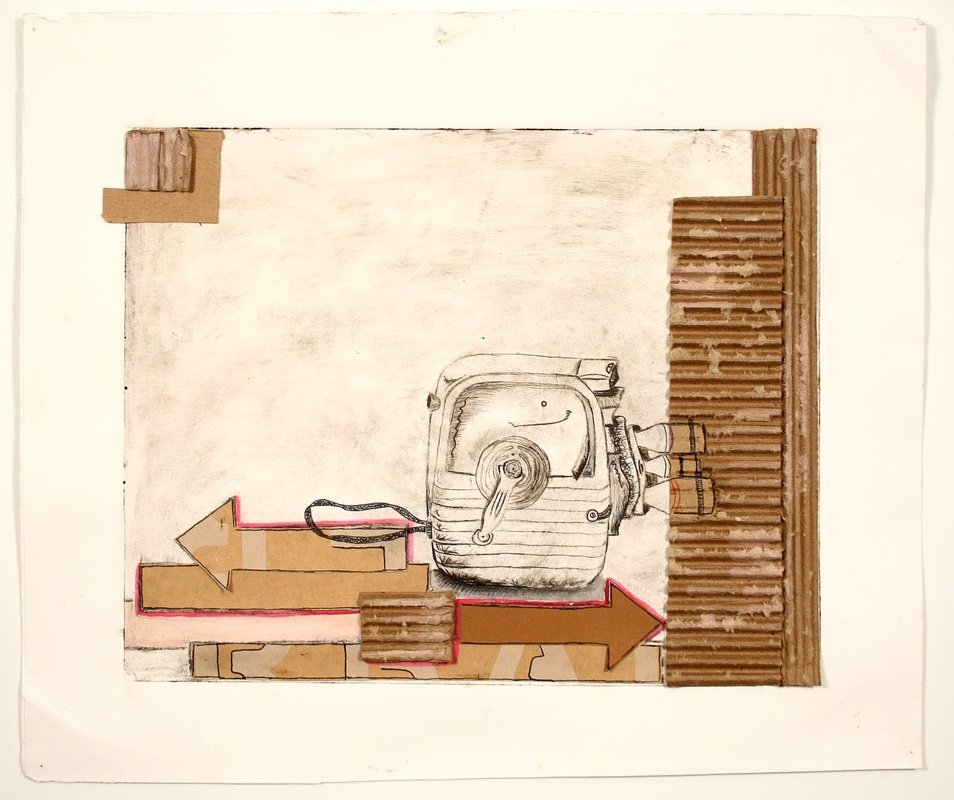
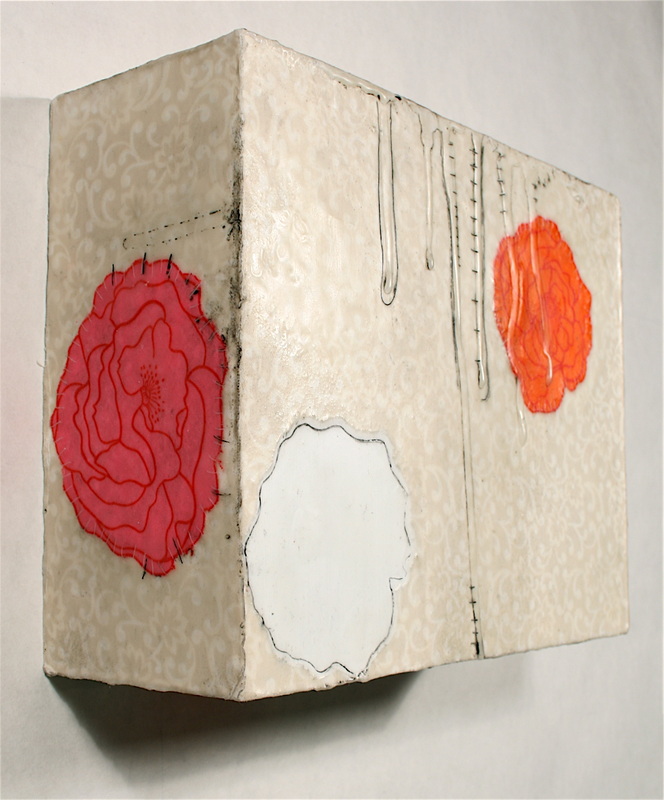
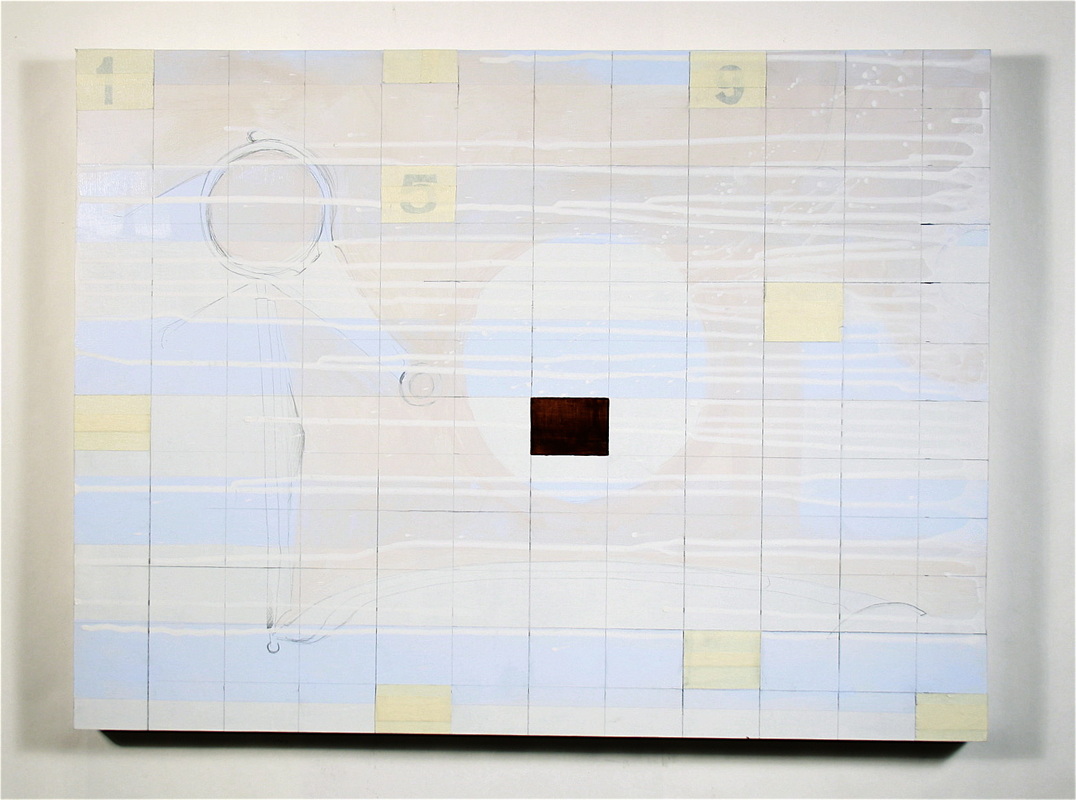
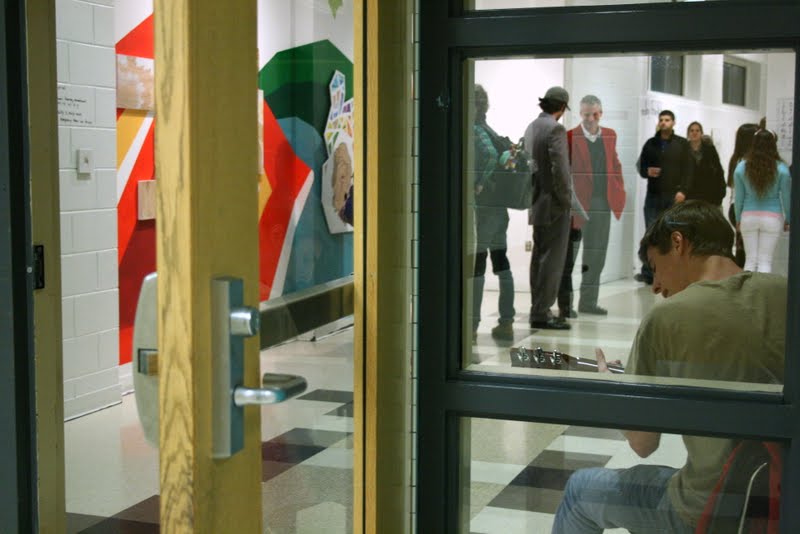
Thinking Big!

I've always wanted my students to be more involved with sculpture and installation, but space, time, and cost of materials have presented a challenge.  For this creative challenge, students will be required to research installation artists, construct a miniature art gallery, create the miniature artwork that will be installed in the gallery they create, and photograph the work in the gallery in a way that convinces the audience that the work is of the scale of an actual full sized gallery. 

This Idea Is not my Invention, but it has always been on my mind as a project for my students.  When I was an art student at VCU, we had a locker (Locker 50B) in one of the art buildings that was transformed into a mini art gallery. It functioned as one of the galleries in the First Friday Art Walk of RVA. They required proposals from interested artists and featured a new artist each month.  They even had openings like regular galleries with drinks, food and music.  

For this project, my Art 4 students will be working in pairs to construct the gallery, curate the contents that will fill it, and create the work for it. 

Here is a list of artists everyone should research and become familiar with before you begin to build your gallery:


Yayoi Kusama
Damien Hirst

Kara Walker
Nam June Paik
Sol LeWitt

Wolfgang Laib
Tara Donovan
Maya Lin


As you begin to plan your gallery design, keep in mind that your gallery can be no larger than 2 feet in any direction.  You are building only 3 walls and a ceiling.  You must have some sort of lighting and you should seek to make this small scale model look as convincingly real as possible.  Dig in and do the research for building miniature environments, and work together as a team with your partner to blow everyone's mind with how realistic your space was designed. 

The work you create to fill your gallery should be made so that it too is convincing of a much larger scale when it is photographed.  Your job is to give us a clear visual of what it would look like if you had the materials and time to fill a large gallery as an installation artist. 

You will need to collaborate with your partner to write an artist statement that goes with the work you installed. You will have exactly one month to design, construct and fill your galleries.   Best of luck to all! 


​Other examples of miniature galleries: 
Stick Your Head In The Gallery
0 Comments

Senior Show:  Everything You Need To Know

3/1/2019

1 Comment

 
Picture
Picture
Picture
Picture
Picture
Picture
Picture
Picture
This is an example of a show card by Denzel Boyd in 2013.  He included a QR code that linked directly to his website.  Many students have used QR codes in their exhibitions as a way to create a new level of interactivity.
Picture
Here is an example of a web banner by Elisa Rudolph in 2013.  
Picture
Picture
Picture
Picture
Picture
Picture
Picture
Picture
Picture
Picture
Picture

What Is The Senior Show?

The senior show is a privilege that is unique to DRHSART, and a great driver of our program's success. At the beginning of each school year, senior students have the opportunity to volunteer for the Senior Show Exhibition Series.  This is not mandatory, and it is only recommended for students with self-discipline and strong work ethics. The expectations for these shows are exceptionally high.

The annual Senior Show Exhibition Series kicks off in November and contains a new exhibition each month until May.  The number of featured artists per show varies depending upon how many seniors choose to participate that particular year.  Since the first show in 2010, we have had over 50 group/solo exhibitions in our gallery.

Photos of Past Shows
Student Created Movie of the show Tres
Student Created Movie of the show "Unorthodox Renewal"

Advice From The Artists

At the conclusion of each senior exhibition, the artists are required to write self-reflections to post on their websites.  Below is a list of selected artists with links to their post-show reflections.  It is HIGHLY recommended that you read these posts and take notes should you choose to have a senior show.  Don't try to re-invent the wheel; take the advice from those students who have already gone through the experience.  Their commentary will help you tremendously.
Taylor Zabinsky
Caroline Cox
​
Mariah Kenny
Meg Bosse
Denzel Boyd
Elizabeth Cox
Kelsey Plusch
Brendan Fisher
Joanna Gray
Nicole Fryling
Amanda O'Connell
​Emma Rasich
​Peyton Barnes
​
​Mona Dandan

Get Organized!


Being organized is paramount, and in this section I will list the many important tasks that you will need to prioritize as you plan your exhibition.  Please don't wait until the last minute to visualize your exhibition, as that will lead to a lot of stress and poor results.  Below is a list of tasks that you'll need to complete, along with a timeline to help you plan.

Choose A Date For Your Opening
It's really important that you look at the school calendar for major events like home football games, basketball games, baseball games, etc.  Shows always draw larger crowds when there is already a captive audience at school on the night of the opening.  In addition to major sporting events, the musicals, plays, concerts, and other auditorium events are also great for drawing a crowd to your show.  Should you choose a date that falls on another major school event, you have to be sure to communicate with those in charge of the events so that you don't step on any toes.  Communication and coordination are crucial.   If you don't know whom to contact about it, ask me and I'll point you in the right direction.
​

Decide On A Theme And Title
Collaborate with your show mate(s) (unless you're exhibiting solo) and discuss the title and theme of your show.  Do mock up drawings of the space and figure out who will be responsible for the multiple areas of the gallery. This should be done more than a month away from your show to be sure that the work you put together leading up to the exhibition stays cohesive.

Advertising Your Show
Collaborate on your advertising campaign.  There have been many creative campaigns in the past, and how well you advertise will determine the success of your show. Do not wait to get started on this!  

Social Media
Social media is the fastest way to spread the word.  Get creative with Instagram and Twitter to create a buzz of anticipation in the weeks leading up to your show.  

Commercials
If you're skilled with video, create a series of short commercials to drive curiosity about your show.  These can be posted on the morning announcement each day for two weeks prior to your show.  Commercials are the best way to make sure the school knows about your exhibition.

See Alana Stokes's Series of Commercials Below
Day 1
Day 2
Day 3
Day 4

See Sara Dabney's Commercial drive.google.com/file/d/1neck8e6caQ0DejwEQRK4AqaOCEQ4-I5o/view?usp=sharing


Morning Announcements /  Interview
Be sure to get your announcement to me two weeks before your show.  I will be sure that the morning news anchors read your announcement each day during the week leading up to your show, and those announcements will also be posted on the official school site.

If you're comfortable in front of the camera, sign up for an interview the week of your show. Be sure you find out how early you need to notify the Wildcat News team about your interview to ensure your spot.  When being interviewed, speak with clarity, and help your potential audience understand your passion for the work you've made.


Show Announcement Card
About a month from your exhibition date, you should create your show invitations.  These do not have to be printed professionally, but many students have done this in the past.  All real art exhibitions are advertised through postcards, so this portion of your ad campaign is mandatory.  You may use any size, but the standard size for show cards is 4"x6".  On this announcement, you should include your name, the date, time, and location of the opening, the month of your show, and your show title.  If you choose to print your cards professionally, here is a list of resources that might help:
Vistaprint
Moo Cards
Overnightprints

Web Banner Announcement

About three weeks before your show, you should send me a web banner to announce your opening.  Since students visit my website daily, this is a great way to remind them of your exhibition opening.  Choose a signature piece as the background, and be sure that the typography is clean and legible.  On your web banner, you'll want to clearly indicate the date and time of your opening, as well as your name and the title of your show.  In order to be sure you've designed your banner to the correct size, simply download one of the current banners from my website, open it in photoshop or illustrator, and then delete the background.  You can then use that size as the template of your web banner, and email it to  me when you're finished.  I'll post it on the site as soon as I receive it via email.

Recruit Help Whenever Possible
Many students have the misconception that they have to do everything by themselves.  That's simply not an efficient approach to such a large project.  Entice your friends to help you with tedious tasks, and you'll free up time for the polishing details that will make your show stand out.  The most successful shows of the past were all products of efficient collaboration.

Use Music To Add Another Layer Of Art
Many of the past shows have included live music. We are lucky to have such an incredibly successful music program at DRHS, and collaborating with students from the music department has always enhanced the quality of show openings.  We've had a wide range of student musicians play at openings in the past, and it would serve you well to get familiar with the students in the Jazz Band.  They're always looking for a place to play, and it makes good sense to have them play at your show.  Our orchestra is also remarkable, and having a quartet on hand for your opening would really add a touch of class. 

Hanging  And Labeling Your Work

Gallery Standard For Hanging Artwork
If you're interested in hanging your work in the traditional gallery fashion, you should be aware that the work should hang at 59" to the center of the work.  That means you should measure 59" from the ground, make a mark, and be sure that the mark you made is in the dead center of your work.  For larger pieces, this may not work if the walls in the long portion of the hallway are not tall enough to allow you to hang the work at the traditional gallery height.  You do not have to hang your work in a traditional manner, and as you look at the many show images of the past, you'll see that many students have gone well outside the traditional realm and have come up with very creative and original solutions to hanging the work.

Labeling 
Students have experimented with many different ways to label the work.  Your labeling should be consistent with the overall aesthetic of your show, and the golden rule is that "simplicity is the ultimate sophistication".  I highly recommend that that you look at the labeling systems in local galleries such as 1708, ADA, Glave Kocen, Reynolds, and Candella.  Visit those galleries, and take photos of how they label the work.  Also check out the labeling system at the VMFA.  It's smart to echo the aesthetics of the local high quality labeling systems, as it will add a layer of professionalism to your show.


Works On Paper
Hanging works on paper can be as simple as taping the work to the wall.  Some students have used T-pins to hang, some have used magnets, and others have even gone as far as spending money on professional framing. It's up to you how you choose to hang your work, just be sure it's done with consistency throughout your show.  It can look awkward if some of the work is matted, some is simply taped, and others are framed.  Try to stay consistent in all things within your show.
​
Works On Masonite

Many students at DRHSART create works of art on masonite because it is inexpensive and  durable.  If you have work on a panel, it can be hung by using small wood scraps, screw eyes, and some picture hanging wire. I can demonstrate this method if you need help. 

Refreshments

You are responsible for the refreshments at your show. In the past, this aspect has ranged from simple chips, cookies and water, all the way a chocolate fountain and sparkling cider.  One show was catered by a student chef that included 7 types of crostini combinations.  How much you spend on entertaining your audience is completely up to you. People do love to eat, and this could be a great way to lure in your audience. I highly recommend that you do the extra work to receive donations from local businesses for your event. You can cut down your costs significantly with a proper letter and some personal contact to business owners and managers. 

The Day Of Your Opening

The day of your show will be crazy!  You'll need to come to terms with this fact.  There will be many last minute touch ups that include cleaning the gallery, setting up the refreshments area, and installing  the proper signage that will guide your audience to the gallery.  The shows begin at 5pm, so you are limited on your time after school to get all of this done.  Please don't wait until the very last minute to create the navigation system for the gallery goers to find your work.

In the past, students have guided the audience to the gallery through many different means.  The most effective means so far has been balloons.  Balloons are easy to spot, and will effectively guide gallery goers who may not have been inside Deep Run before.  Arrows taped to the floor have also been effective in the past.

Post-Show Cleanup And Reflection

At End Of The Opening
Once your show has ended (7pm), it is your responsibility to clean up properly.  Clean up includes removing all navigation signage, cleaning up any extra materials that have been stored in my classroom, picking up any trash in the gallery, and moving works back into the back of the hallway that may have been stored in classrooms for your opening.

Post Show Reflection

All students who have a senior show are required to answer a series of reflective questions that will help guide those who show in the future.  These questions will be emailed to you the day after your show, and will need to be posted on your site within one week of receiving the email.  If you've read everything on this blog post thus far, you've already seen the questions you'll be answering on your blog.

Taking Down Your Show
At the conclusion of your show, it is really important that you are considerate of the artists who will be exhibiting after you.  You are given complete autonomy with the gallery space, and many artists choose to paint walls.  Whether you choose to paint the walls or not, it's your job to leave the gallery space as a blank canvas for those who follow you.  Sanding, priming, painting, patching holes, and cleaning up any dust left behind in the process are all part of your responsibilities.  DO NOT be selfish and leave the gallery in shambles after your show.  It has happened in the past, and nothing disappoints me more than seeing students selfishly leave the walls a mess with the expectation those who follow them will take care of it.  If you make a mess, you clean it up.

Final Thoughts
BE PROUD OF WHAT YOU CREATED!  These exhibitions are a lot of work, and you should be exceptionally proud that you worked as hard as you did to make it successful.  This is the most real-world experience you could possibly get out of my class, and your commitment to your show has certainly taught you about collaboration, creativity, communication, and critical thinking.  The best part is that you worked so hard and didn't do it for a grade.  In fact, you and I never once talked about how you would be evaluated or graded.  You worked hard to make this exhibition successful because you take pride in your work and this experience is about showcasing your creative work ethic.  You deserve to be proud of yourself, and you've certainly made DRHSART, and our community proud.
1 Comment

Drawing Inspired Drawings

1/1/2019

0 Comments

 
Picture
Picture
Picture
Picture
Picture
Picture
Picture
Picture
Picture
Picture
Picture
Picture
Cast A Wider Net, And You'll Catch More Ideas
​One of the most difficult tasks of making art is coming up with ideas that feel authentic and original.  Having taught for so many years, I've noticed that even the most academically inclined students can have profound struggles developing original ideas that have value. The proven best way to power through the difficult task of creating good work is to simply make a lot of work. This 3 part unit was designed to have my students make a lot of work in a short amount of time. Throughout this unit, students will learn to deconstruct their own preconceptions of what it means to "draw", and will learn these great lessons that I read in the book  Art and Fear :  

 “What you need to know about the next piece is contained in the last piece. The place to learn about your materials is in the last use of your materials. The place to learn about your execution is in your last execution. Put simply, your work is your guide: a complete, comprehensive, limitless reference book on your work.”

“For most artists, making good art depends upon making lots of art and any device that carries the first brushstroke to the next blank canvas has tangible, practical value.”
​

Homework, Choosing Inspiration:
Each student is required to choose a small, portable object that has conceptual and/or aesthetic interest to him or her.  The object needs to be brought to the classroom, and will need to be with the student throughout the duration of the first 10 drawings.  The first 10 "drawings" will be made from direct observation of the object,  can be no larger than 8” x 10”, no smaller than 4"x 6" in total surface area, and must be completed by the critique date listed on the calendar.

First 10 Drawings:
Rules and Regulations
These drawings can be no larger than 8”x10” and no smaller than 4"x 6" in total surface area. You will be given two weeks to complete the drawings. The first ten drawing can be completed in any order, but each drawing must be labeled on the back with a description of the assignment and the order in which it was completed. Additionally, on the back of the work, you must list the media used.  A portion of the grade will be determined by how well these directions were followed.  This introduction to the 30 works you will create is aimed at just getting you started and not overwhelming you with choice.  This is assignment is the vehicle to simply make you create a lot of work in a short amount of time without being paralyzed by theorizing too much about what you'll make.

1. Academically Rendered:
The entire object must fit within the picture plane. Though the whole object exists within the space, I do not want there to be any space used inefficiently. This drawing needs to be proportional, and should contain marks that resemble the Old Master's drawings such as those created by Michelangelo, Raphael, Leonardo, Tintoretto, Titian, Rubens, Durer, and Caravaggio. You spent plenty of time studying the marks of the masters in Art 3, now it's time to apply what you learned in an observational drawing. All of your rendering should be created through cross contour hatching, not through smudge blending.  It is recommended that you use a dark media such as charcoal or ink.

2. Tightly Cropped:
This drawing of your object should be cropped so that it overlaps a minimum of three of the sides within your picture plane. This drawing can be fairly experimental so long as it is tightly cropped.  Though you may not draw from a photograph, you may experiment with cropped compositions with your phone or camera to guide your observational drawing.  

3. Drawn with an Obstacle:
In much the same way Matthew Barney would have done, you are required to create a situation that makes the execution of the drawing cumbersome or more difficult than it would be traditionally. Then attempt to create an image that embraces the difficulty of the task, while at the same time demonstrates your understanding of mark-making and arrangement.  This drawing will produce an image unlike anything you've made before if you're following the rules.  On the back of this drawing, please explain the drawing challenge you created for yourself as well as what you learned when creating.

4. Reduction Drawing:
Coat the surface on which you will be drawing with a medium tone of powdered charcoal or any other easily removable material. Use an eraser or other tool for removing media to develop the highlights and structure of the drawing (without drawing a “white contour drawing”). Only after the medium tones and lightest tones have been developed will you be able to apply the dark tones with a charcoal pencil or stick. The main concern in this drawing challenge is tonal range. It would be wise to choose a dramatically lit environment.  Again, Please work not from a photograph but rather from direct observation of your object. 

5. Dramatic Drawing:
Use extreme lights and darks to create an image that simplifies the object that you’ve chosen to draw. Attempt to create some sort of ambiguity, and leave the viewer with questions about what you have drawn. Don’t be afraid to explore abstraction in this drawing.  More than anything, give the viewer a sense of drama. 

6. Continuous Contour Line:
Create a drawing of your object by which your drawing tool never lifts from the surface on which it is moving. Once your tool hits the surface, it should remain connected throughout the duration of the entire drawing. Don’t cheat, or the process will be lost.  It is recommended that you use ink for this activity.

7. Experimental Media:
This drawing requires you to use non-traditional media. Not only should it be non-traditionally drawn in general, but it also must be a risk for you. You may not make this drawing using any media or process that you have used in the past. Risk-taking is essential to creative growth, and that is what this particular assignment cultivates. Lose your fear of being wrong, because you cannot be wrong on this assignment unless you choose not to try something brand new.

8. Make Your Mark:
Make a drawing of your object that utilizes your strengths. What do you consider to be your comfort zone and style in terms of making art? Use those techniques and processes in this challenge to create and image that gives you confidence. It should feel natural when you are making this drawing. If you don’t feel like you have a style or process that you can call your own, just make this drawing that gives you comfort.

9. Print Made Image:
This drawing or “print” of your object should be created through some sort of printmaking technique. It can be done with any of the relief or intaglio methods.  You can even invent your own method of "printmaking" if you'd like. 

10. Your Choice:
The drawing should be made, from observation, using any of the techniques that you found intriguing or successful.​  Please make this drawing last.  The reason you're to make this one last, is because I want you to experience the other drawing challenges before you make your choice. 


Second Set of 10 drawings:
In this second set of ten drawings, students are encouraged to experiment, take risks, and expand upon IDEAS and CONCEPTS that are present in the most successful images from the first set of drawings.  Students are challenged to conjure questions about the definition of “drawing”, and are encouraged to move beyond the physical object from which the original set of drawings was inspired, exploring the meaning of the object and the experience of mark-making.  Students are required to have all work prepared for critique by the date indicated on the calendars that organize the class. 


Third Set of 10 Drawings:
In this set of ten drawings, students are to refer only to the second set of drawings that were made, and should be expanding on the most successful work in that particular set.  These ten drawings are to be worked on simultaneously, and should all be completed at approximately the same time.  The purpose of this third set of drawings is to create a body of work that has conceptual and visual consistency.  Though consistency is sought, these drawings should each retain a sense of individuality.  

Drawing a Conclusion:
You now have 30 works of art!  Some are better than others, but each was an important step toward making the successful images you created.  Now that you have this collection of small work, it's time to make one work of art, inspired by your final set of 10 drawings. This time the only rule is that it may be no smaller than 22" x 30".  You will have 3 weeks to finish this piece.

In addition to having this work of art finished in three weeks from the date you began, you are also expected to write a minimum of 1 paragraph that helps me understand the process you went through and the creative discoveries you made throughout this unit.  If you were invested in this process, you hopefully have come to understand that sometimes the most direct path to your best work is to simply roll up your sleeves and make a heck of a lot of work, getting lost in the process, and worrying less about the outcome.

0 Comments

VMFA Presentation  (semester exam)

11/26/2018

0 Comments

 
Picture

Assessment Rubric

​Half of your grade for this  project will be based on the design of the visuals that accompany your presentation.  The grade for the design of your presentation will be based on the following:  
(10 points per element)
​
\ LEGIBILITY 
\ ORGANIZATION 
\ QUALITY OF INFORMATION
\ VISUAL ENGAGEMENT
\ CREATIVITY

​The other half of your grade for this project will be based on the delivery of your presentation.  ALL presentations must be at least 7 minutes and no more than 10 minutes.  The grade for your delivery will be based on the following:  
(10 points per element)

\ KNOWLEDGE OF MATERIAL 
\ CLARITY OF SPEECH 
\ EYE CONTACT 
\ ENTHUSIASM 
\ TIME 

THE VMFA PRESENTATION

​For this Semester Exam, students are required to choose two works of art from the Virginia Museum of Fine Arts to thoroughly research and give a 7 -10 minute verbal presentation that is accompanied by a visual presentation (Google Slides, Prezi, or any other dynamic visual presentation means).  The works of art chosen should be of great interest to the presenter, and should be chosen strategically in an effort to inform the individual artwork of the presenter. Each presentation must address WHY the student chose the works for research and explain HOW the research might impact his or her future work. In the presentation the student is required to Describe, Analyze, and Interpret the works to provide meaningful context for the audience.  The presenter must also give context to the artist who made the work, being sure to include at least one meaningful quote from the artist to help the audience better understand the artist's approach.

The Breakdown:

7-10 minute presentation. (Should be rehearsed)
Explain WHY you chose the work
Explain HOW the research will impact your future work
Describe the work (What are we seeing?)
Analyze the work  (How is it designed?)
Interpret the work (What does it mean?)
Give context to the work and its maker
Provide a meaningful quote from the artist
0 Comments

Artist Statement

9/18/2018

0 Comments


Writing An Artist Statement


Artist Statement Examples
Pam Sutherland
Sally Bowring
Jeffery Deane Hall
Mike Guyer
Mary Scurlock

I want to thank my good friend Jeff Hall, lead art teacher at Maggie Walker Governor's School,  for this organized approach to teaching students to craft well-written and thoughtful artists statements. 

Objectives: 
The students will:
  • Examine various examples and styles of artist statements for best practice
  • Reflect on the process, personal meaning, and projected message of his or her work
  • Establish an online Google doc to  share with instructor and peers
  • Write and continually edit the artist statement in preparation for his or her senior show.

Step One:  What Is An Artist Statement?
  • An artist’s written description of their work and process.
  • The brief written representation supports his or her own work to give the viewer understanding.
  • It should inform and  provide context for the work.
  • It should be short, didactic, descriptive, and reflective in tone.

Step Two:  Looking At Examples
  • Look at the examples of artist statements provided on the left portion of this blog entry.
  • Make a list of the components covered in those documents.  How are they similar and different?

Step Three:  Reflecting On Your Own Work
  • In your visual journal, answer the following questions.  These can be short phrases or ideas.  We’re just brainstorming here.
  • In one sentence explain what your work is about.
  • What is your favorite material? Why?
  • How did you get into this work?
  • What are your favorite things about your work?
  • Are there any patterns that emerge in your work?  Subjects? Process? Formal elements?
  • If you’ve been making work for awhile (Art 5) How does your recent work fit into the broad body of work?
  • What do you do differently from the way you were taught? Why?
  • Create a list of words and phrases that describe your chosen themes, your artistic values, creation process, and influences.

Step Four:  Writing The First Draft (of many)
  • In your Critique Log, begin by writing in first person.   This is just the first draft, so don’t stress out too much.  Label this entry with:  Artist Statement September 2017, and be sure it is at the very top of your critique log. 
  • First paragraph. Begin with a simple statement of why you do the work you do.  Support that statement, telling the reader more about your goals and aspirations.
  • Second paragraph. Tell the reader about your process and how you make decisions in the course of your work. How and why do you select materials, techniques,  and how do they support the ideas in your work? Keep it simple.
  • Third paragraph. Tell the reader a little more about the context of your work. How it grew out of prior art work or life experiences or culture. What are you exploring, attempting, challenging by doing this work.  Bring it to a nice closure.
  • Some sentence examples are:
  • In my work, I am exploring _______________.I begin a piece by______________.I know a piece is done when__________________.When my work is going well, I am filled with a sense of _____________.When people see my work, I hope they will ________________.

Grading Rubric
  • Addresses your idea – 25 points
  • Discusses your process -25 points
  • Addresses the context of your work – 25 point
  • Correct grammar and spelling in essay – 25 points

Resources:
  • http://hyperallergic.com/63686/the-best-artist-statement-generator-ive-seen-yet/
0 Comments

Online Personal Brand Assessment 

9/7/2018

1 Comment

 
Picture

Digital Portfolio Assessment


Your Online Brand
Using Wix.com, you were expected to design a website that celebrates your creativity and your knowledge of art.  The website should have separate pages for the following:

Portfolio
Sketchbook
Artist Statement


High quality digital portfolios are deliberately designed to highlight the artist's best work, be navigated intuitively by the users, and bring context to the work and processes used by the artist. These portfolios are designed with images that have been edited with consistency, and are presented in a very clean and simplified digital environment.  

The Online Portfolio
Design Assessment

Level 4 digital portfolios are deliberately designed to highlight the artist's best work, be navigated intuitively by the users, and bring context to the work and processes used by the artist. These portfolios are designed with images that have been edited with consistency, and are presented in a very clean and simplified digital environment.  

Level 4 portfolios contain the following:
  • The artist clearly followed the directions and has separate pages for the portfolio, visual journal, and artist statement.
  • The artist created a site that has a clean and simple design quality.
  • The artist designed the navigation in a user-friendly and intuitive manner.
  • The images were photographed and edited with consistency of exposure, white balance, contrast, saturation, and clarity of focus.
  • The portfolio is thoughtfully organized to emphasize the most impressive work.
  • All elements on each page of the site were deliberately designed.
  • The language of the artist statement is grammatically correct, clear, succinct, and establishes the context of the work and the process by which the work was made.
  • The typography is legible, sophisticated, and supportive of the overall character of the work presented.


The Online Portfolio
Design Assessment

Level 3 digital portfolios seem to highlight the artist's best work, are navigated easily by the users, and seem to help bring context to the work and processes used by the artist. These portfolios are designed with images that have been edited mostly with consistency, and are presented in a simplified digital environment.  

Level 3 portfolios contain the following:
  • The artist followed the directions and has separate pages for the portfolio, visual journal, and artist statement.
  • The artist created a site with simplistic design.
  • The artist designed the navigation in a mostly user-friendly and intuitive manner, but has a few inconsistencies in navigation functionality.
  • The images were mostly photographed and edited with consistency of exposure, white balance, contrast, saturation, and clarity of focus.  Though the images looks mostly consistent, a scrutinous eye can notice variations in the manner in which the work samples have been photographed and edited.
  • The portfolio is mostly organized to emphasize the most impressive work, but there are works of art with lesser quality that get too much attention upon quick navigation through the site.
  • Most elements on each page of the site were deliberately designed, but there are noticeable elements of the site that seem clumsy or arbitrary.
  • The language of the artist statement is mostly grammatically correct, fairly clear, and gives an understandable context of and process by which the work was made.
  • The typography is legible and supportive of  the overall character of the work presented.

The Online Portfolio
Design Assessment

Level 2 digital portfolios are designed with limited ability to highlight the artist's best work, or be navigated intuitively by the users.  These portfolios do not bring a clear context to the work or processes used by the artist. These portfolios are designed with images that have been edited with limited consistency, and are not presented in a clean or simplified digital environment.  

Level 2 portfolios contain the following:
  • The artist designed separate pages for the portfolio, visual journal, and artist statement, but these pages have limited content.  
  • The artist created a site in which simplicity of design was not paramount.
  • The artist has not designed the navigation in a user-friendly and intuitive manner, and has many inconsistencies in navigation functionality.
  • The images were not photographed or edited with consistency of exposure, white balance, contrast, saturation, and clarity of focus.
  • The portfolio is not organized to emphasize the most impressive work, as there are works of art with lesser quality that get too much attention upon quick navigation through the site.
  • Some elements on each page of the site were deliberately designed, but there are many elements of the site that seem clumsy or arbitrary.
  • The language of the artist statement is not grammatically correct, and does not give an understandable context of or process by which the work was made.
  • The typography is legible but inconsistent in its support of the overall character of the work presented.


The Online Portfolio
Design Assessment

Level 1 digital portfolios are not designed to highlight the artist's best work, or be navigated intuitively by the users.  These portfolios do not bring context to the work or processes used by the artist. These portfolios are designed with images that have been edited without consistency, and are not presented in a clean or simplified digital environment.  

Level 1 portfolios contain the following:
  • The artist designed separate pages for the portfolio, visual journal, and artist statement, but these pages have very little content.  
  • The artist created a site in which simplicity of design was not paramount.
  • The artist has not designed the navigation in a user-friendly and intuitive manner, and has many inconsistencies in navigation functionality.
  • The images were not photographed or edited with consistency of exposure, white balance, contrast, saturation, and clarity of focus.
  • The portfolio is not organized to emphasize the most impressive work, as there are works of art with lesser quality that get too much attention upon quick navigation through the site.
  • Most of the elements on the pages of the site seem arbitrarily designed.
  • The language of the artist statement is not grammatically correct, and does not give an understandable context of or process by which the work was made.
  • The typography is legible but inconsistent in its support of the overall character of the work presented.


1 Comment

Divergent Writing

9/6/2018

0 Comments


What Does It Mean To "Write Divergently"? 

In all honesty, I don't even think "divergently" is an actual word.  I made it up to describe the type of writing I've been doing in my journal since 2004.  So, for the past 15 years I've been using my journal as a tool for idea development and reflection.  I can attribute all of my best ideas about my work to this tool, and I value it enough to make the process part of your curriculum. 

To ensure that each of you practice this type of writing, I've assigned warm-up tasks that require you to write about various prompts throughout the year.   You will all get better at this as the year progresses, and I truly hope you find the value in this process the way I have for the past 15 years.  Below is a quick example with tips of how I would like to see you writing in your journals. 


0 Comments

Preparing for the 1st DRHSART Gallery Show of the year

9/4/2018

0 Comments


SUMMER 2018
ART
45
Picture
It is a tradition at DRHSART that the opening exhibition of the new school year in our gallery incorporates ALL students of ART 45.
Critique of Summer Work
Students will be arranged into small critique teams.  Each team will move around the room and evaluate the work of their team members. During this time, students should be having a dialogue about what works, what doesn't, and why. All students will take notes in their visual journals as this occurs. 

After the small team activity, we will move to the gallery where we will have a full class critique and discussion about the work that was made.  Work will be professionally photographed as it is discussed by the class, and all work must be taken home after it has been documented. The only work that will remain in the hall at the conclusion of critique week are those pieces that will be on display during the October Exhibition.

Self Reflection Critique Log Entry
All students will need to write a self-reflection for their summer artwork.  This reflection should be written well since it represents your intellect in your portfolio, and should be very honest.  This critique log is where you will demonstrate your growth as an artist and creative thinker. The critique log will be created by me, but will be shared with you.  I'll provide rich feedback about your work, and the log will be used consistently throughout your entire time in Art 4 and Art 5.  


0 Comments

Feeling Stuck?

4/1/2018

0 Comments

 
Picture
Picture

Keep Working!!

Too often, students come to the studio and say they don't have the materials they need for their current project, or that they can only work on the project outside of school.  These "justifications" for not utilizing studio time are no longer going to be accepted in class.  In order to get those students working again, I'm creating this page with various resources for ideas about how to spend studio time creating rather than waiting to create. 

The images on this page came from a site dedicated to more than 50+ Still Life Drawing Ideas​.  It's an excellent resource with high quality examples of upper level art student work.  From this point on, if I notice a student not utilizing studio time, he or she will be directed to this page  to choose an idea and begin working.  

Resources 

50+ Still Life Drawing Ideas​
Tips from a successful AP Studio
Student Advice about finding your voice
Stunning IB work from a high school artist

Other Helpful links

Mashup List
Random Number Generator


0 Comments

Design Thinking Unit

3/12/2018

0 Comments

 
Picture
Useful Links
What is Design Thinking?
​

Brainstorm Tips

Lucidchart


Collaborative Re-Design of DRHSART
Teacher Directed, Student Driven

PART ONE
Dreams and Gripes
​ What we do at DRHSART has worked really well, and we've proven year after year that we know how to get results. But, that's not enough.  This program is predicated on excellence, and in order to continue the tradition of excellence we've established, we must look at how we do things and spot opportunities for improvement. Let's put our brains together and improve this program as a whole.
​

Procedure:
Today the class will be broken into small collaborative teams.  The initial stage of this collaboration is aimed at bringing students together through a "Dreams and Gripes" session that will produce design opportunities for improvement. 

Once the groups have been established, the student are given banner paper, sticky notes, markers and pens.  The students then organize their large sheet of paper into four main categories (Motivation, Spaces, Systems, and Curriculum).  Each of those categories will be subdivided into "Dreams" and "Gripes".  The focus here is to spot opportunities for change (Gripes), and visualize the ideal version of this class (Dreams).  Students are asked to join the collaborative brainstorm tool called Lucidchart, where we will later organize the content of these brainstorm sessions. 

When listing the dreams and gripes, it's important for students to stay on task, not get caught up in complaining, as we are looking to spot opportunities for improvement rather than reasons to be unhappy. 

The next stage of the assignment involves voting on the many thoughts that have been provided by all of the groups from the Dreams and Gripes sessions.  These thoughts will be voted upon in LucidChart using a three color sticker system that will indicate Important, More Important, and Most Important.  Each student will receive those three stickers and will cast their vote by dragging their three "stickers" where they deem them most fitting.  This stage will give us a clear indication of which thoughts are resonating with the entire class, and will provide some direction for how to narrow our focus moving forward. 

PART TWO
Defining Challenges
After the voting is complete, the class will be re-arranged using a Google Sheet where they are able to choose their team in the next stage.  Students are able to choose their teams based on the category for improvement in which they are most interested.  The class will then be re-arranged according to the new teams, and will be directed to begin defining challenges for improvement.  With the given information in the Lucidchart, these teams are expected to narrow their focus and list ways in which we might address the opportunities for change that have been made most clear by the voting stage. 

Things to consider as challenges are being defined: 
  •  Be realistic about how much can get done in two weeks. 
  •  Delegate responsibilities evenly among team members. 
  •  Aim for big changes in a short amount of time. 
  •  Create a detailed timeline for making these changes. 

Each team will be expected to create a presentation  using a pre-designed template to make things easier to discuss.  Students are required to follow the directions below when opening and creating copies of the links for the pre-designed presentations. 

​Spaces
Solutions

Systems
Solutions

Curriculum
Solutions

Motivation
Solutions


Directions for Opening, Sharing, and Saving the Presentations
Choose one student in your team to open the two presentations that apply to your group's topic.  Once opened, that student should follow the directions below:


1.  Make a Copy of the Presentation:  This is as simple as going to File>Make a Copy..

2.  Rename Your Presentation:  Directions for naming each of your presentations can be found on the first slide when opened.

3.  Set Up Sharing Rights:  For each of your six presentations, please click the share button in the upper right corner once opened.  You will have several options for sharing.  Please set each member of your group, and the instructor, with the rights to Edit.  Add additional rights for viewing only to  "Anyone with the Link".  This process will be briefly demonstrated in class.

4.  Turn In Your Presentations:  Once ALL presentations are completed, your team will need to turn in the viewable links to the Google Spreadsheet linked below that will be shared with all of my students, and anyone else who visits this site.  

Google Spreadsheets of Opportunities and Solutions

At IDEO, one of their mantras is"Build on the ideas of others".  In keeping with their idea, the results from your presentations will be archived and built upon in the future by the next generation of DRHSART students. 


0 Comments
<<Previous

    Art 45
    Assignments

    This blog is the growing archive of Art 45 Assignments for DRHSART.  You can search assignments by category or date below. 

    Archives

    October 2021
    March 2019
    January 2019
    November 2018
    September 2018
    April 2018
    March 2018
    September 2017
    August 2017
    May 2017
    January 2017
    February 2016
    December 2015
    September 2015
    April 2015
    January 2015
    August 2014
    May 2014
    March 2014
    February 2014
    September 2013

    Categories

    All
    Artist Statement
    Assessment
    Brand
    Collaborative
    Design
    Exhibition
    Gallery
    Presentation
    Research
    Rubric
    SGM
    Team
    Website
    Writing

    RSS Feed

Powered by Create your own unique website with customizable templates.